
The editor
The editor is where you design an episode. It works like a design tool on top of a video timeline, but it is made for one job. You place animated components on the real 1080×1920 frame and time them to the words you speak.
Open it from the dashboard with Open editor, or run reelforge edit <id>. reelforge cue <id> opens it in Cues mode and reelforge dev <id> in Review mode.
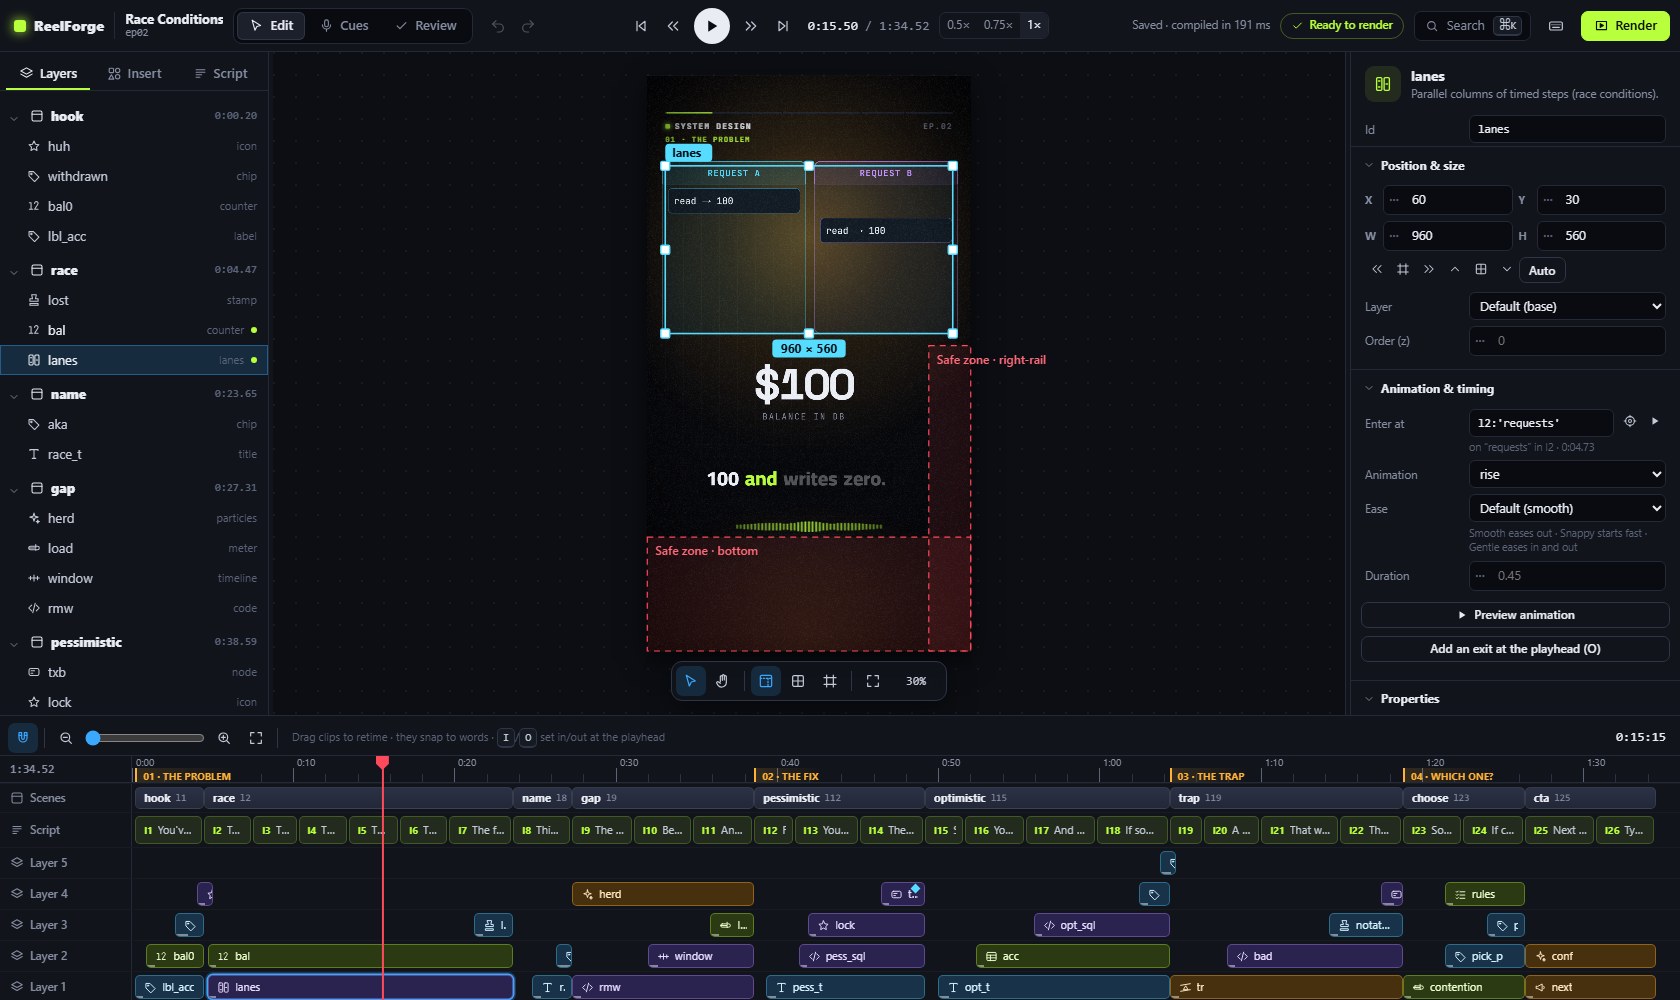
| Area | What it holds |
|---|---|
| Top bar | Modes (Edit · Cues · Review), undo/redo, transport and speed, status, checks, search, Render |
| Left panel | Layers (scenes → elements), Insert (every component) and Script (your lines) |
| Canvas | The real frame, rendered by the same engine as the final video, synced to your voice |
| Right panel | The Inspector for whatever is selected (or the episode settings when nothing is) |
| Timeline | Chapters, scenes, script lines, one track per layer, and your voice waveform with sound effects |
Every change is written to episode.yaml immediately, and your comments and formatting are kept. Every change can also be undone (⌘Z / Ctrl+Z), including cue changes. You can keep episode.yaml open in a text editor at the same time. Edits made there appear in the editor as soon as you save.
Canvas
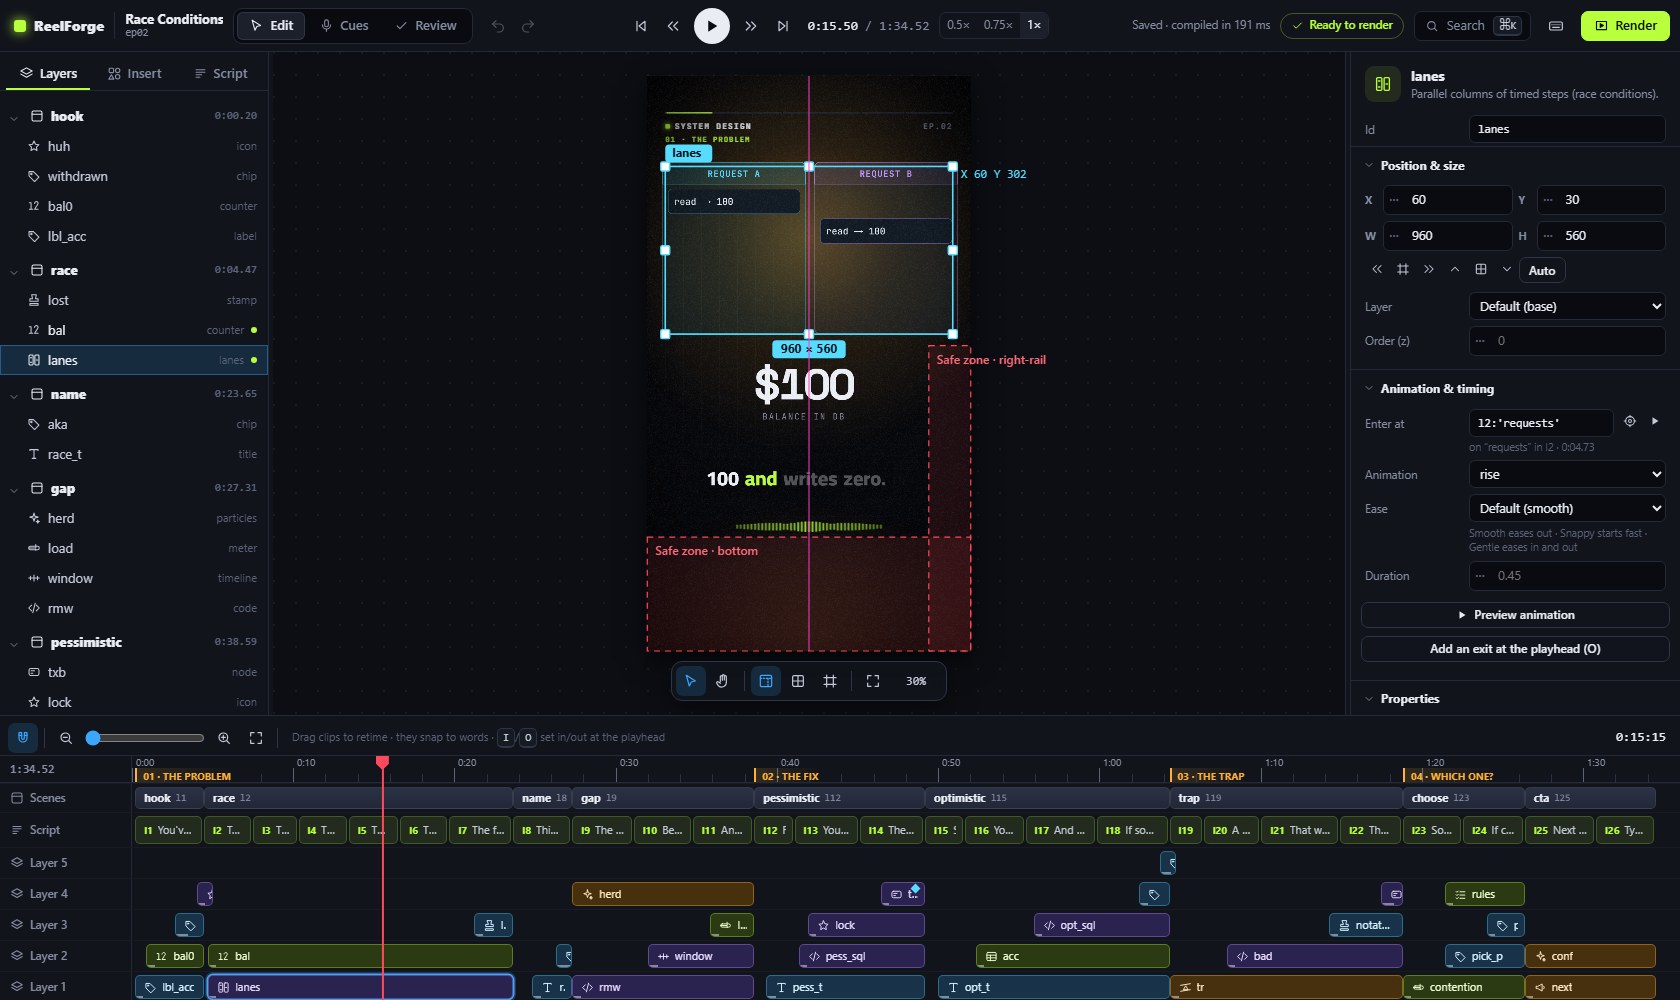
- Click an element to select it. Alt+click selects the one underneath. Hover shows an outline.
- Drag to move. Smart guides snap to the frame center, the scene area and other elements. Hold Shift to move in a straight line, or Alt to turn snapping off.
- Drag a handle to resize. Hold Shift to keep the proportions, or Alt to resize from the center.
- Use the arrow keys to nudge 1 px (Shift: 10 px).
- Double-click a title, label, chip, stamp, quote, node or ending card to edit its text in place. Press Enter to save or Esc to cancel.
- Drag a component from Insert onto the canvas to add it there.
- Zoom with ⌘/Ctrl + wheel, Shift+1 (fit), Shift+2 (selection) or Shift+0 (100%). Pan with the wheel, by holding Space, or with the H tool.
- The floating toolbar toggles the safe zones (Z, where TikTok/Reels/Shorts draw their buttons), stage and caption guides (B) and element outlines (E).
Layers, Insert and Script
Layers lists every scene and its elements. The top of each list is drawn on top. Click to select (the playhead jumps to a moment when the element is visible), drag to reorder, and double-click to rename. Renaming also updates any arrows that point at the element. A green dot marks what is on screen at the playhead.
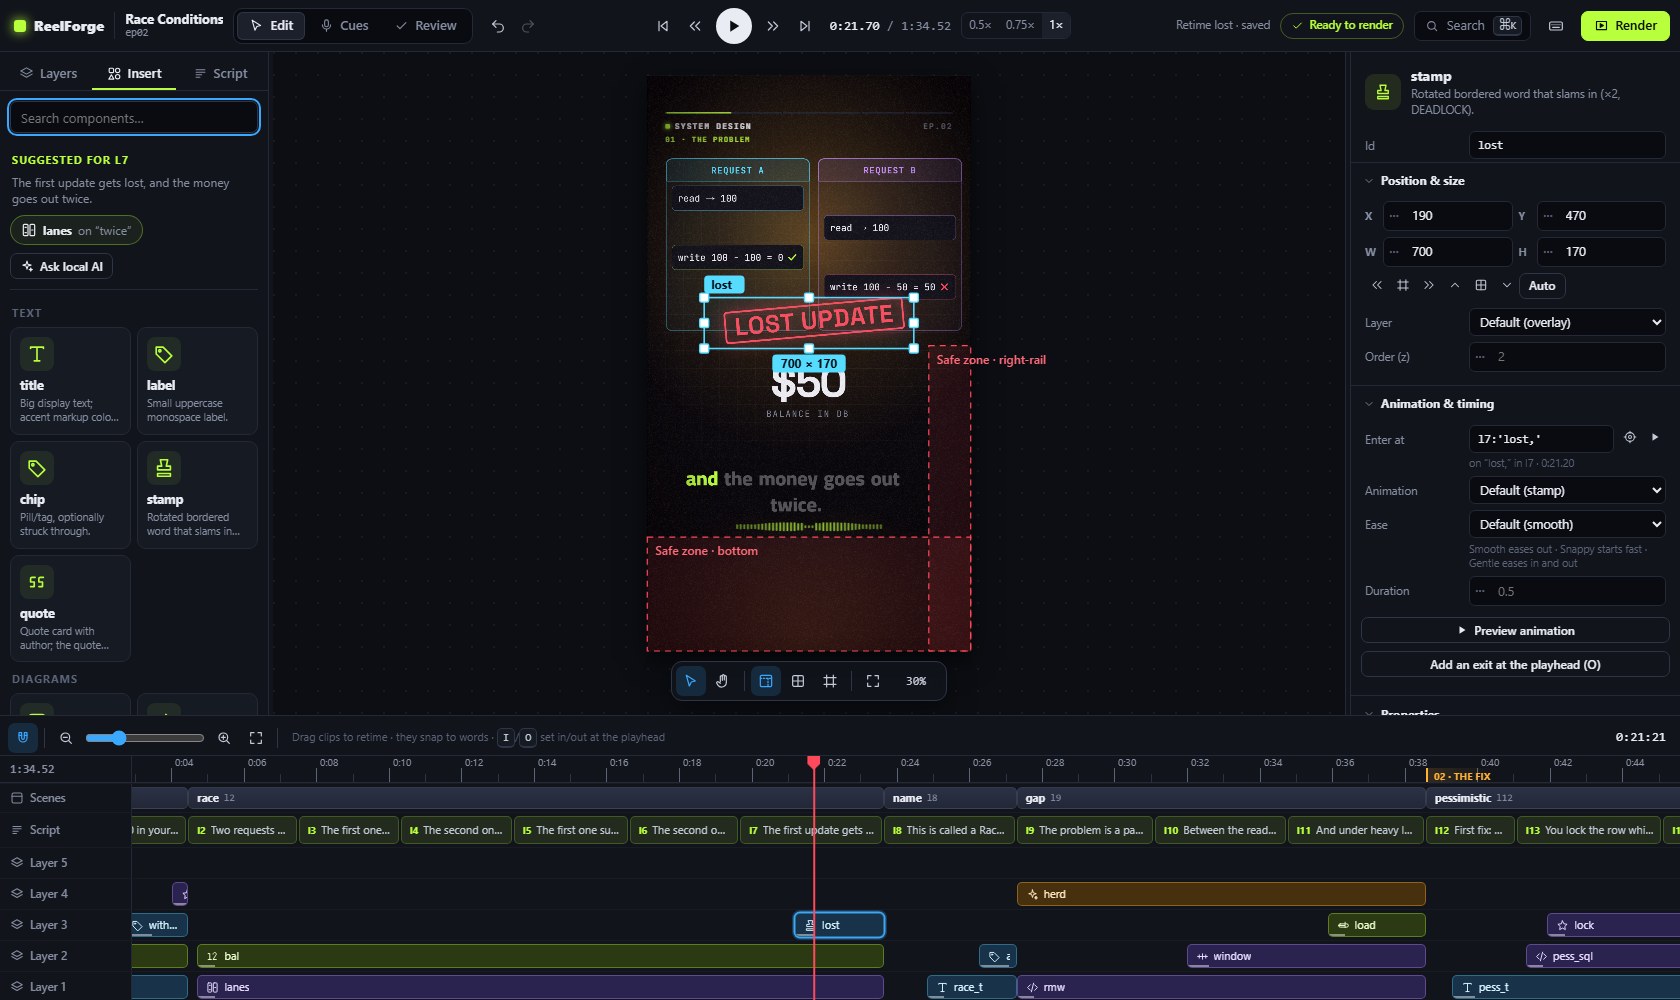
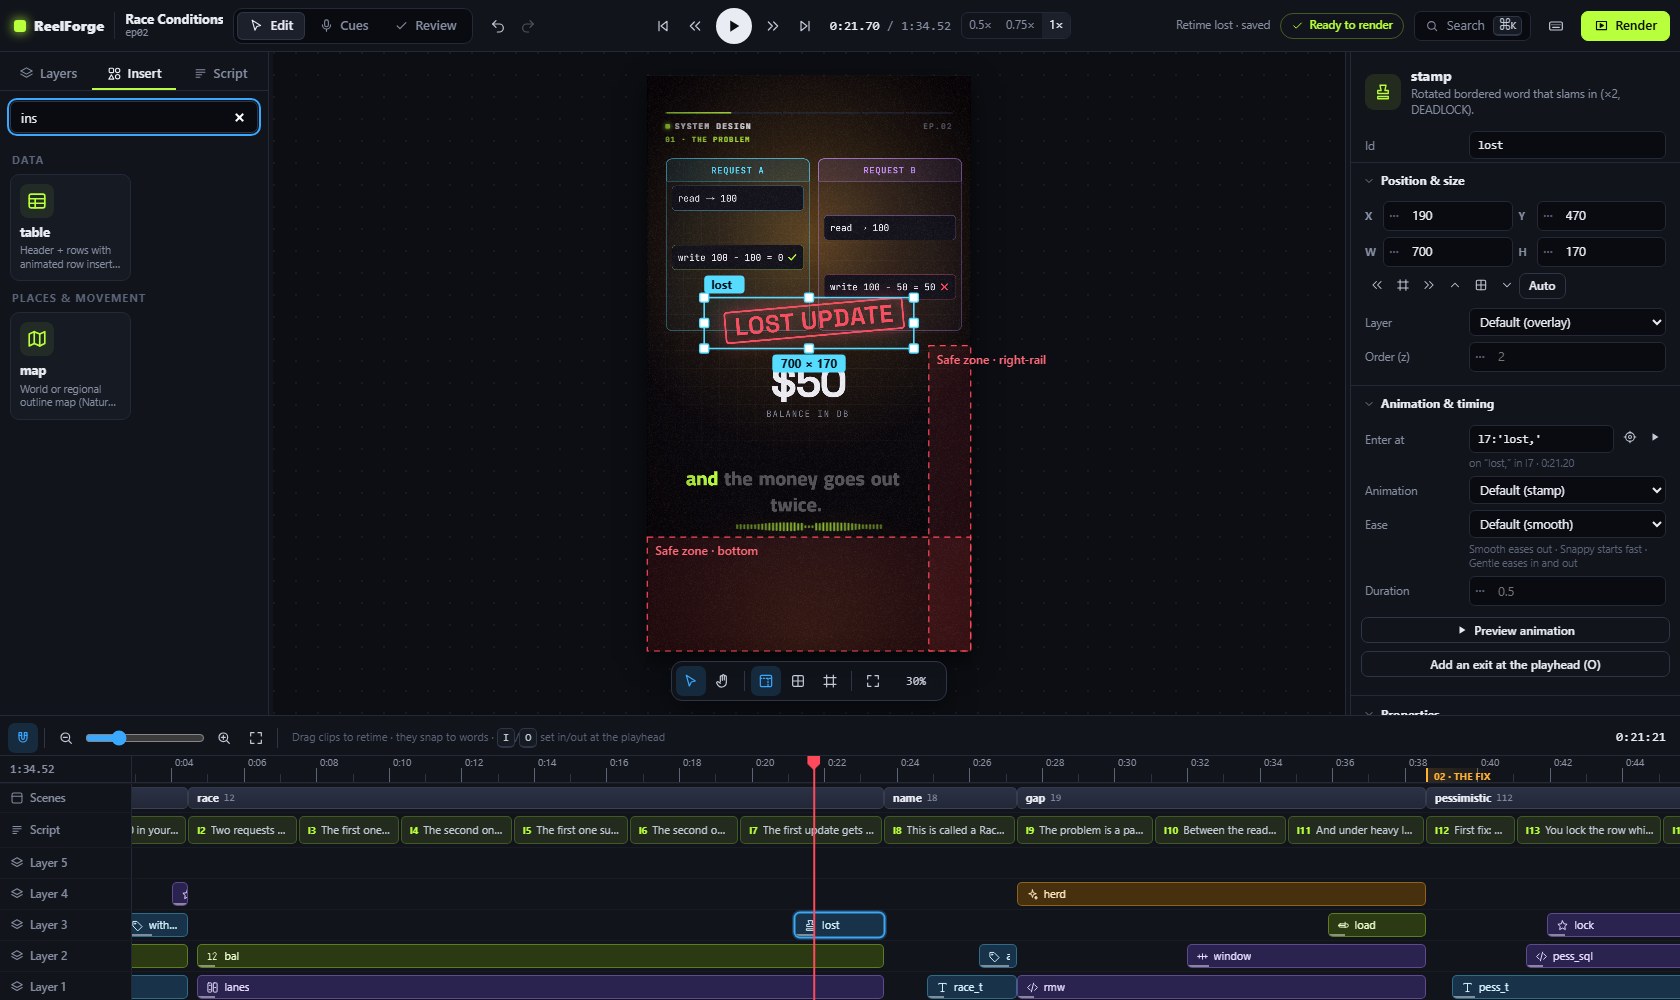
Insert shows all 62 components in groups: Text, Diagrams, Data, Charts, Process & structure, Places & movement, Time, People & messaging, Media & text, Health & data, Code & devices, Effects & endings. Click one to add it to the current scene at the playhead, or drag it onto the canvas. New elements start with sensible content that you can change at once.
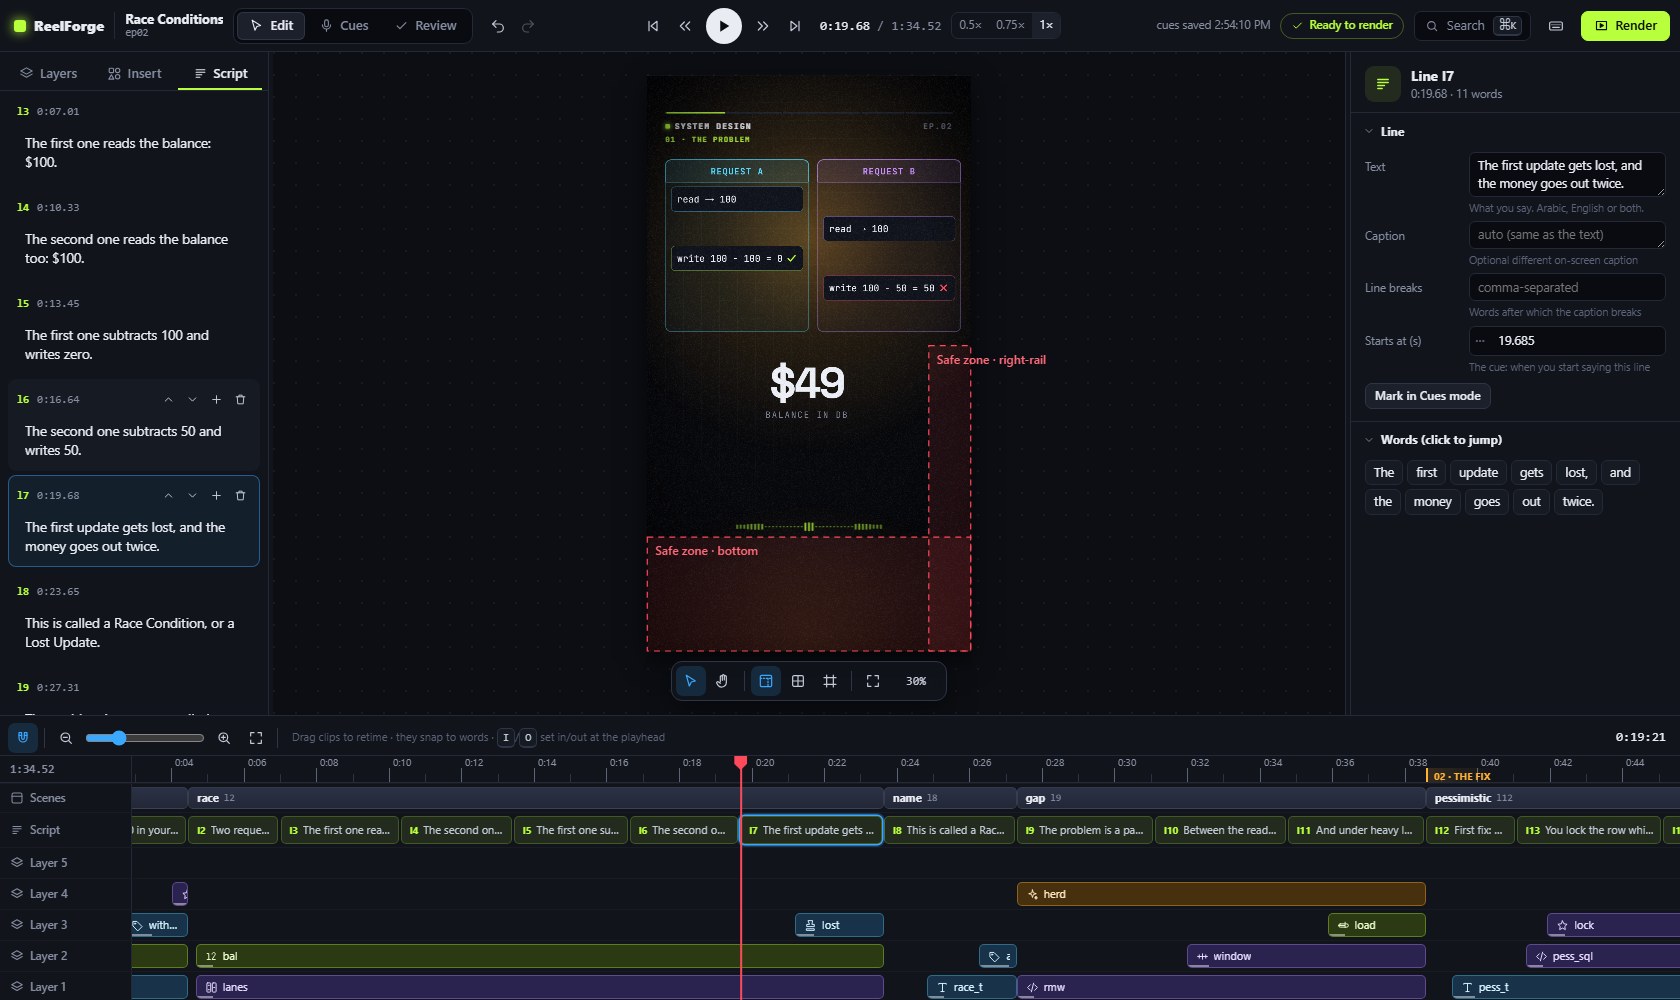
Script is your text, one spoken sentence per line. Edit a line in place. Use the line's buttons to add, delete or reorder lines. Arabic, English and mixed lines are all supported, and the direction is detected automatically.
Inspector
The inspector edits every property of the selection:
- Position & size (X, Y, W, H), alignment buttons, layer and stacking order.
- Animation & timing: when it enters, the animation, its ease and duration, and an optional exit. Preview animation plays just that moment once; choosing a new animation or ease previews it automatically. The target button sets a time from the playhead. It writes a word-anchored time such as
l3:'bucket'whenever the playhead is on a word, so the element stays on that word even after you re-record. - Properties: every option of the component, generated from its schema. That covers text fields, numbers (drag the dotted handle to scrub), on/off switches, menus, colors (theme swatches or any color), times, and lists you can add to, reorder and remove from.
- Effects (shake, flash, glitch, pulse, bump) and States (prop changes at a time, e.g. a node turning red).
- Sound: automatic sound effects on or off.
- YAML (advanced): the exact YAML of the element. Anything the format supports can be edited here.
With a scene selected, the inspector edits its start and end, transition, camera move (with Preview transition), area (stage or full frame), background glow and auto-layout. With a script line selected, it edits the text, caption, line breaks and cue, and lists every word (click one to jump to it). With nothing selected, it edits the episode: title, series, platform, theme, language, publishing texts, audio and chapters.
Timeline
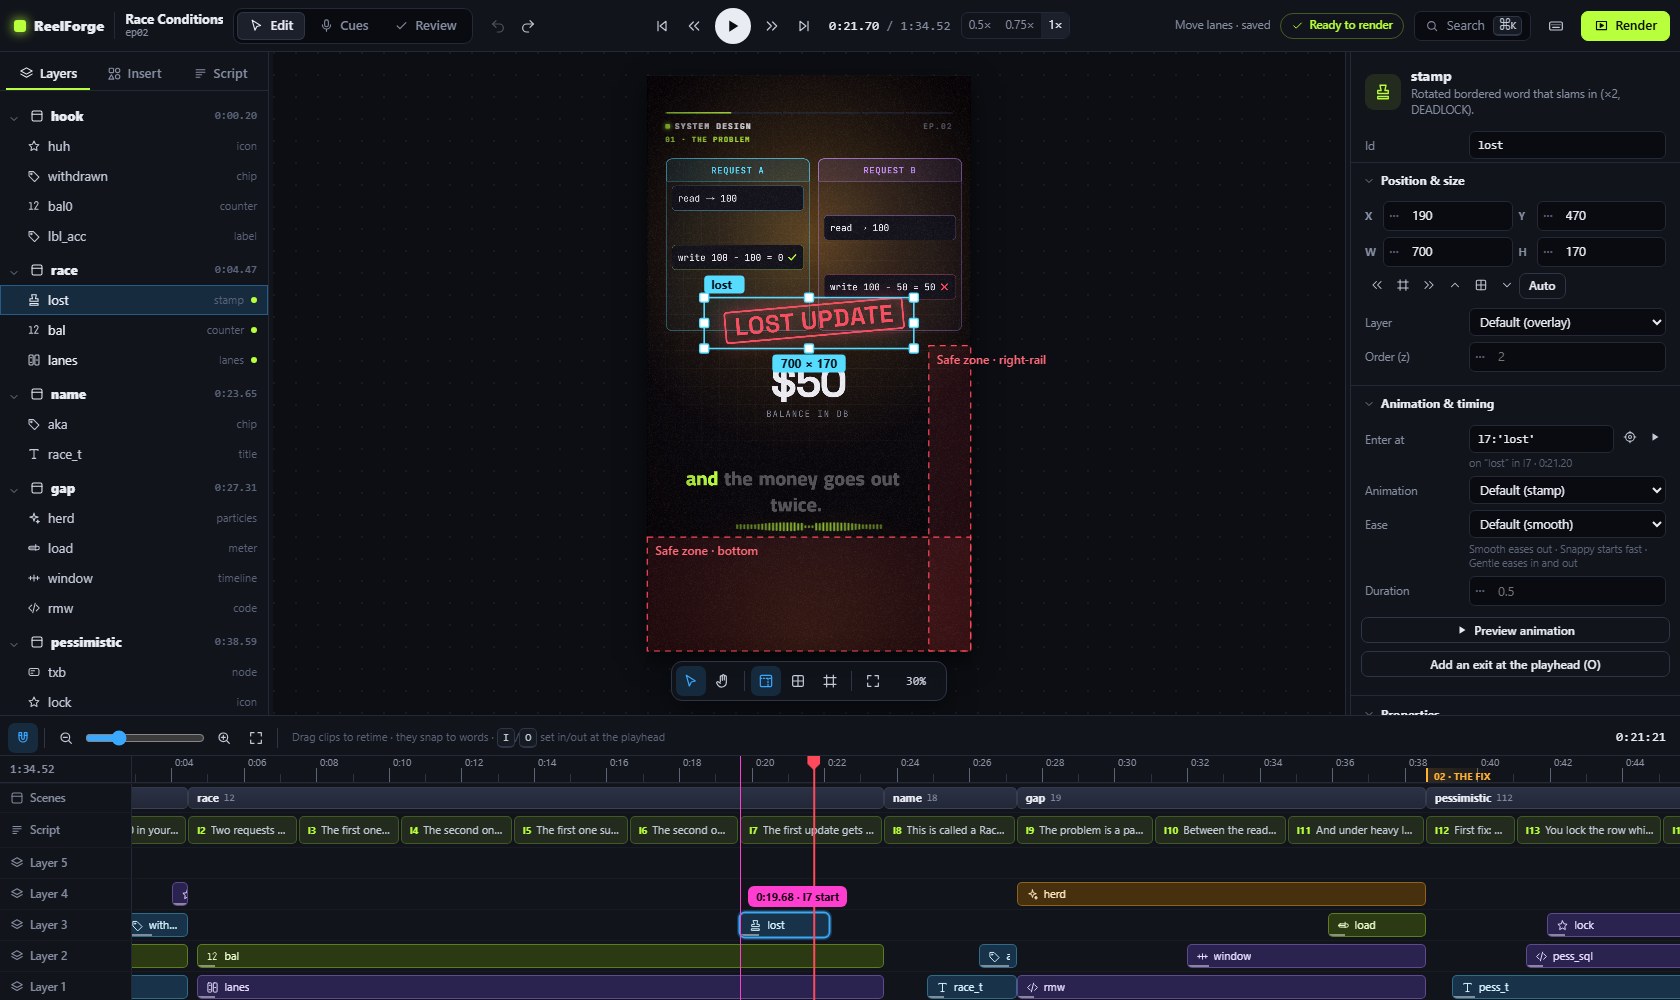
- Click or drag the ruler to move the playhead. Chapters are shown on the ruler.
- Scenes: drag a scene's start to move it.
- Script: each line is a clip. Drag it to change its cue. Its word marks move with it.
- Layer tracks: each element is a clip from when it enters to when it leaves.
- Drag the body to retime it.
- Drag the left edge to change when it enters.
- Drag the right edge to set when it leaves. Dragging it to the end of the scene removes the exit.
- Diamonds mark effects (orange) and state changes (blue).
- Clips snap to words, line starts, scenes and the playhead. The badge shows the time expression that will be saved. Hold Alt to drag freely, or press S to turn snapping off.
- I and O set the selected element's in and out points at the playhead.
- Zoom with = / −, the slider or ⌘/Ctrl + wheel. \ fits the whole episode.
Search everything: ⌘K / Ctrl+K
The command palette finds every command, component, scene, element and script line. Type a few letters and press Enter. Try insert counter, go to scene trap or safe zones.
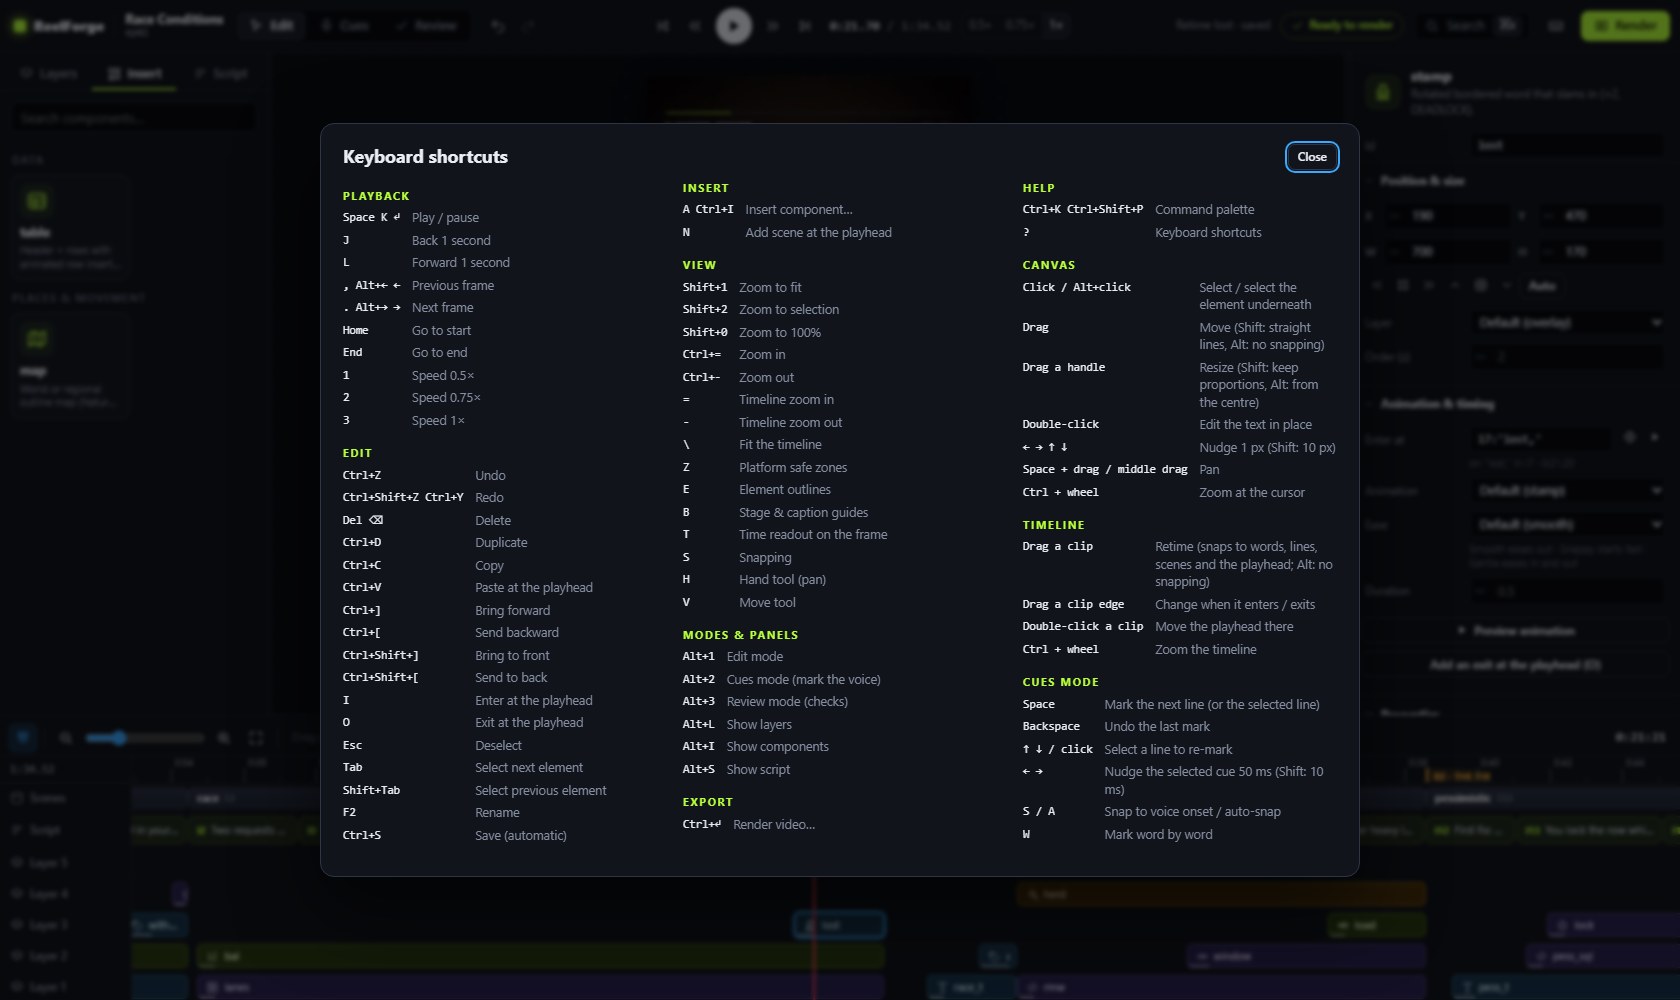
Right-click the canvas, a layer or a clip for the most common actions. Press ? to see every shortcut.
Review mode
Review (Alt+3, or click the checks pill in the top bar) lists every issue found by the checks: schema, timing, overlaps, safe zones, text overflow measured in the real browser, and caption length. Each issue has a fix hint. Click an issue to jump to its time and select the element.
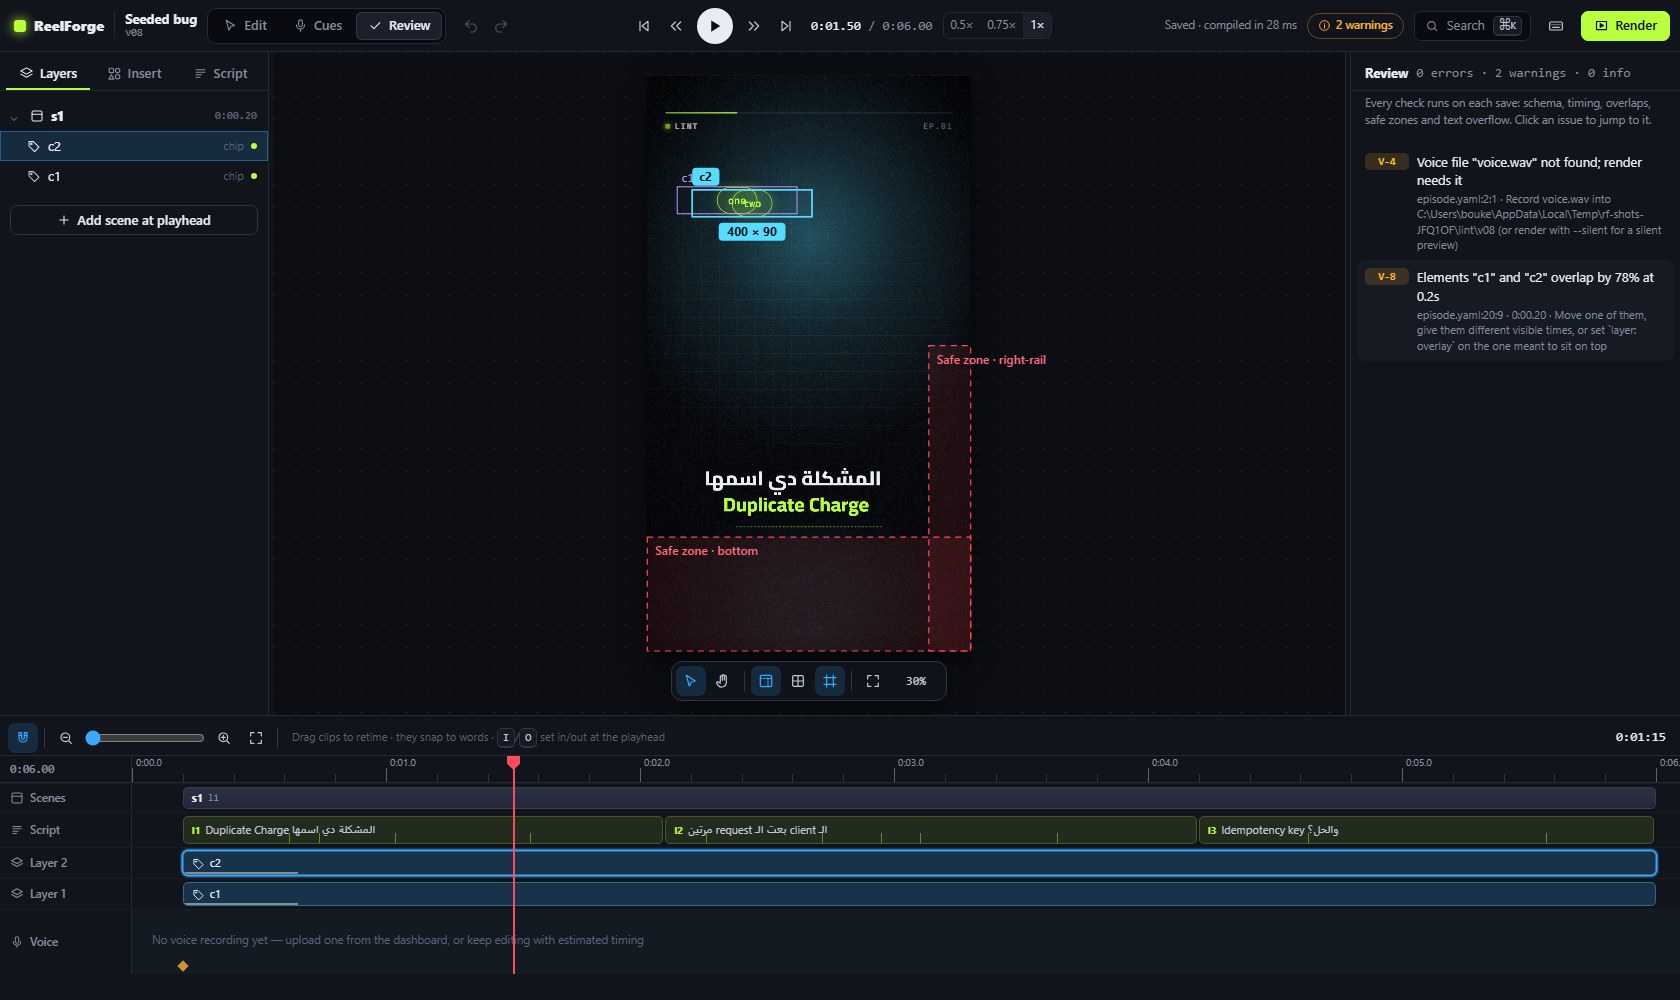
If episode.yaml has a syntax error (for example after editing it by hand), a banner shows the line and the message. The editor keeps showing the last version that worked.
Rendering from the editor
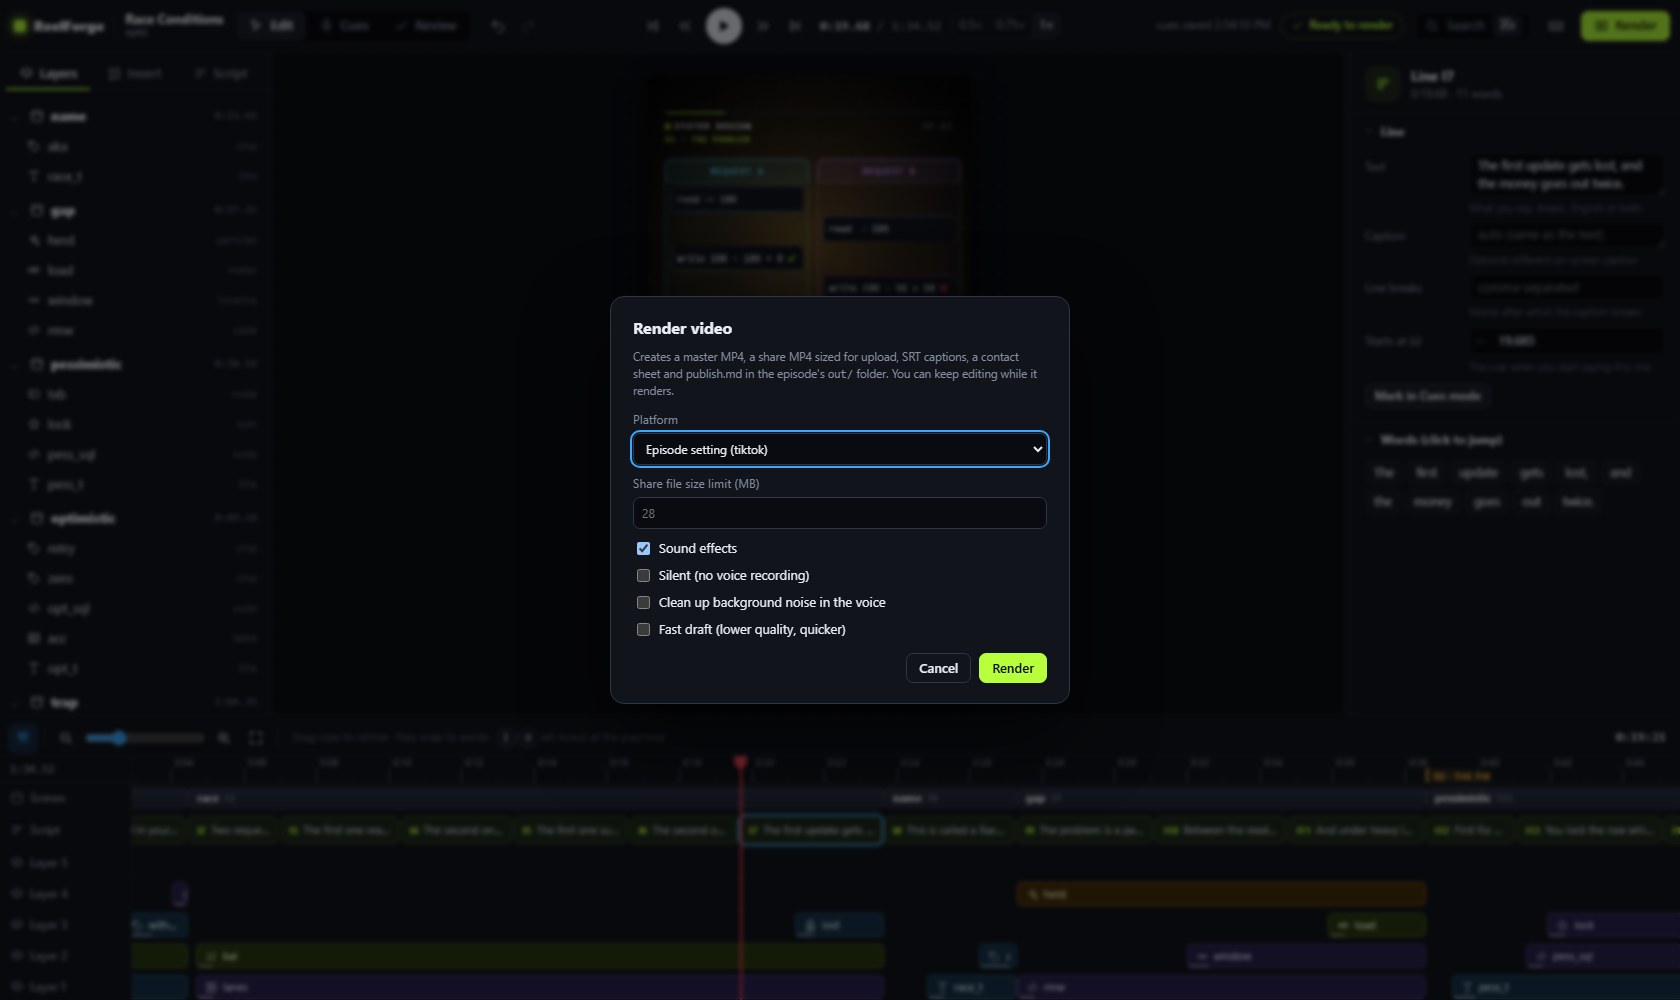
Click Render (⌘/Ctrl+Enter) and choose the platform, the share-file size, sound effects, silent mode (when there is no recording yet) and a fast draft. You can keep editing while it renders, and the progress shows in the top bar. When it finishes, the videos open in a player with download links.
Shortcuts at a glance
| Keys | Action |
|---|---|
| Space / K | Play / pause |
| J / L, , / . | −1 s / +1 s, previous / next frame |
| Home / End | Start / end |
| 1 2 3 | Speed 0.5× 0.75× 1× |
| ⌘/Ctrl+Z, ⌘/Ctrl+Shift+Z | Undo, redo |
| ⌘/Ctrl+D, ⌘/Ctrl+C, ⌘/Ctrl+V | Duplicate, copy, paste at the playhead |
| Delete | Delete the selection |
| ⌘/Ctrl+], ⌘/Ctrl+[ | Bring forward, send backward |
| I / O | Enter / exit at the playhead |
| A | Insert a component |
| N | Add a scene at the playhead |
| Tab / Shift+Tab | Next / previous element |
| Z, B, E | Safe zones, stage guides, outlines |
| S | Snapping |
| Alt+1 / 2 / 3 | Edit / Cues / Review |
| ⌘/Ctrl+K | Command palette |
| ? | All shortcuts |